By Mees de Beukelaar
How to Schedule Instagram Reels for Maximum Reach
Find the best times to post Instagram Reels, schedule them natively or with tools, and use hooks, captions, hashtags, and batching to boost reach and engagement.
Originally published December 24, 2025
In this article
Instagram Reels are a powerful way to grow your audience, with 200 billion daily plays across Facebook and Instagram. But timing matters - posting at the right moment can boost views, likes, and comments significantly. Research shows that Reels posted between 12:00 p.m. and 2:00 p.m. perform better, while 5:00 a.m. is emerging as a key time for 2025.
Here are the essentials for scheduling Instagram Reels effectively:
- Best Times to Post: Use Instagram Insights to track your followers' activity and aim to post 30–60 minutes before peak times.
- Scheduling Tools: Instagram’s built-in scheduler allows Reels to be planned up to 75 days in advance. For more advanced options, tools like OpenClip automate content creation and scheduling across platforms.
- Content Tips: Keep Reels 7–30 seconds long, add captions, and start with a strong hook to grab attention in the first 3 seconds.
- Engagement Boost: Use targeted hashtags, pair Reels with Instagram Stories, and monitor performance metrics to refine your strategy.
If you're managing multiple platforms or creating Reels in batches, tools like OpenClip can save time by automating video editing and scheduling, making it easier to post consistently and engage your audience.
Quick Tip: Post 3–5 times a week during high-engagement periods like 7–9 a.m., 12–1 p.m., or 7–9 p.m., and track your results to optimize further.
How to Schedule Reels on Instagram Desktop & Mobile for FREE!
Finding the Best Times to Post Instagram Reels
Your audience's activity patterns are unique to your account, so relying on generic posting times won't cut it. The best strategy is to dive into your own Instagram data to figure out when your followers are most active. This shift from guesswork to informed decisions can make a huge difference. Here's how Instagram Insights can help you turn raw data into smarter posting times.
How to Use Instagram Insights to Track Follower Activity
Instagram Insights is a handy tool that shows when your followers are online, but you’ll need a Business or Creator account with at least 100 followers to access it. To get started, open your profile, tap Insights (or go to Menu > Insights), and head to Total Followers. Scroll down to the Most Active Times section, where you'll find bar charts displaying when your followers are most active throughout the day and week. You can toggle between Hours to see peak times for a specific day and Days to pinpoint which days of the week your audience is most engaged.
Instead of posting your Reel right at the peak activity time, try sharing it 30 minutes to an hour before that window. This gives Instagram’s algorithm enough time to distribute your content so it’s front and center when your audience starts scrolling.
Testing Different Posting Times
Trial and error can also help you zero in on the best posting times. Post similar Reels at different times or on various days, then check the "Content you shared" section to filter by Reach or Interactions. This will show you which posting times performed the best. While studies suggest engagement often peaks between 8:00 a.m. and 12:00 p.m., Monday through Thursday, your audience might follow a completely different pattern.
"Record your posting times and look back each week to identify your best-performing posts, taking note of when they were posted." – Katelyn Rhoades, CEO, Enfluence Marketing Agency
Since audience behavior can shift over time, it’s a good idea to review your Insights weekly to spot any changes. If your followers are spread across different time zones, focus on the region where most of your engaged audience is located. Alternatively, you can aim for "universal" times, like 9:00 a.m. EST, which often overlap with active hours in multiple regions.
Keep in mind that industry trends can also influence engagement. For example, food-related content tends to perform well around meal times, while travel posts might see a spike on Sundays when people are planning their next trip. Use these insights to tweak your posting schedule and maximize the impact of your Reels.
How to Schedule Instagram Reels Step-by-Step
Planning your Instagram Reels in advance can save time and help you post consistently. Instagram’s built-in scheduling tool allows you to schedule content up to 75 days ahead, with a maximum of 25 scheduled posts per day. To get started, make sure your account is set to either Business or Creator mode, as this feature isn’t available for personal accounts.
Creating Your Reel
First, open the Instagram app and tap the + button, then select Reel. You can either record new footage directly in the app or upload a pre-recorded video from your camera roll. For best results, format your video in a 9:16 aspect ratio (1080x1920 resolution) to ensure it fills the screen. While Reels can be up to 90 seconds long, videos between 7 and 30 seconds tend to perform better.
Once your video is ready, enhance it with Instagram’s editing tools. Add audio, AR effects, filters, and text overlays. Since many users watch Reels without sound, consider using closed captions or text overlays to make your content accessible. To keep your profile grid visually appealing, design a custom cover image (1080x1920) with bold, easy-to-read text. When you’re satisfied, hit Next to proceed to the sharing screen.
Scheduling Your Reel
Now that your Reel is ready, it’s time to schedule it for the best posting time. On the sharing screen, write your caption, then tap Advanced Settings (iOS) or More Options (Android). Toggle the Schedule this reel option, select your desired date and time (up to 75 days in advance), and tap Done, followed by Schedule.
Keep in mind that some features, like product tagging, collaborative posts, sponsored posts, and fundraisers, aren’t supported by Instagram’s native scheduling tool. Additionally, if you’re using trending audio from Instagram’s library, make sure to add it during the editing stage, as only original audio is fully compatible with the scheduling feature.
Managing Scheduled Reels
Once your Reels are scheduled, you can review and adjust them as needed. Go to your profile, tap the Menu (three horizontal lines), and select Scheduled Content. Alternatively, access it through the + button and then Scheduled. From here, you can tap the three dots next to any scheduled Reel to reschedule, publish it immediately, or delete it.
While you’re able to edit captions and locations after scheduling, changes to the video itself aren’t allowed. If you need to update the video, you’ll have to delete the scheduled Reel and upload a new version. If a trending event makes your Reel more timely, you can use the Share Now option to publish it right away.
Automating Reel Scheduling with OpenClip
When it comes to scheduling Reels, tools like OpenClip (https://openclip.app) take things a step further by simplifying the process and ensuring consistency. While Instagram's native scheduler is functional, it’s pretty basic, and manually creating a steady stream of Reels can eat up a lot of time. OpenClip helps by automating the transformation of long-form content - like podcasts, webinars, or YouTube videos - into engaging 9:16 Reels and scheduling them for peak audience activity. The result? You can focus on crafting creative strategies while keeping your audience engaged.
How OpenClip Simplifies Reel Creation and Scheduling
OpenClip uses AI to sift through your long-form videos and identify the most captivating moments. Whether you upload an MP4 file (up to 200 MB) or share a video link, OpenClip’s ClipAnything model scans for visual, audio, and emotional cues to pinpoint highlights. It then reformats these moments into the optimal 9:16 (1080x1920) aspect ratio, adds animated captions for viewers who watch without sound, and even evaluates the viral potential of each clip.
Timing is everything on Instagram, as engagement within the first 30 minutes to 2 hours can significantly influence how widely your content is distributed. OpenClip ensures your Reels are scheduled during high-traffic periods and publishes them in high-quality 1080p MP4 format, giving your content a polished, professional look.
This batch-processing approach can save creators 5–10 hours every week. Instead of painstakingly editing and posting individual Reels, you can produce 10–15 clips in one session and let OpenClip handle the distribution over several weeks. Consistency pays off: brands that post 3–5 times a week often see 2–3x higher engagement rates, and even smaller accounts with fewer than 5,000 followers enjoy an average 3.81% engagement rate on Reels.
Collaboration Made Easy with OpenClip
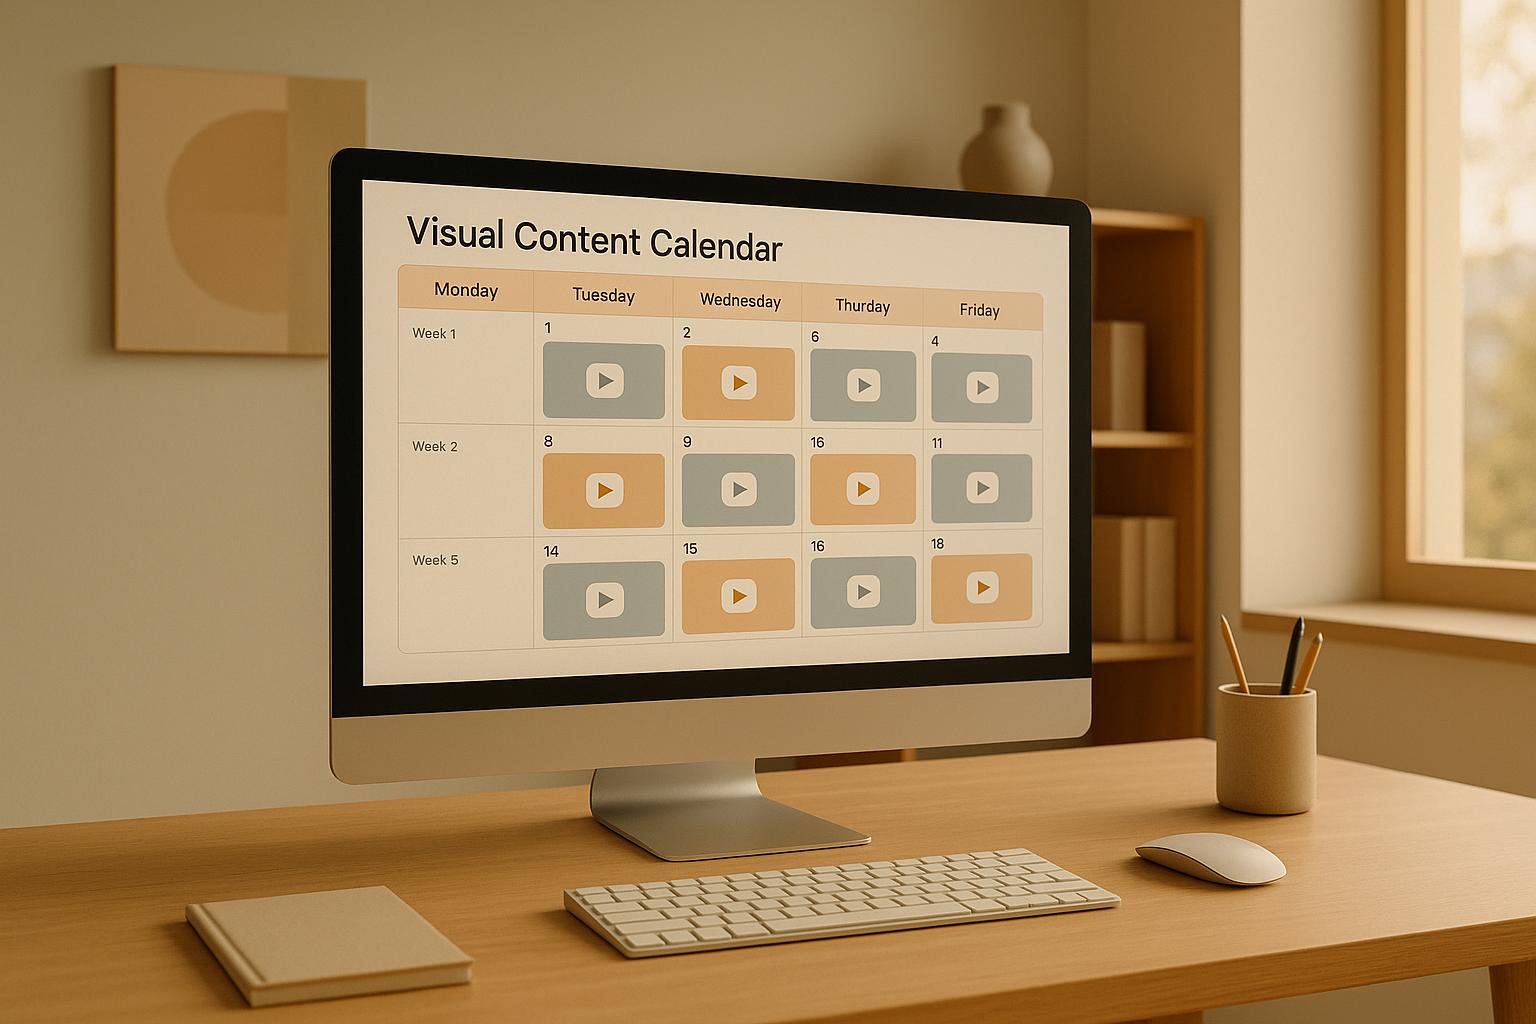
Scaling your content output often requires teamwork, and OpenClip’s Business plan ($29/month) is designed with collaboration in mind. Role-based permissions allow team members to draft, review, and schedule Reels from a single dashboard. A shared visual calendar provides a clear overview of all scheduled content across platforms like Instagram, TikTok, and YouTube Shorts, making it easier to identify content gaps and coordinate campaigns.
The platform also simplifies the approval process. Instead of relying on cluttered email threads, OpenClip lets teams manage approvals directly within the tool. As one expert put it:
"For agencies, the post approval workflow is a must. You can draft a Reel, then send it to a client or manager for approval right inside the platform. It kills the endless email chains and gives everyone a clear look at what's coming up."
- OneUp
To keep your brand voice consistent, teams can save reusable caption templates and branded hashtags, ensuring every post aligns with your messaging.
sbb-itb-5598afdInstagram Native Scheduling vs. OpenClip
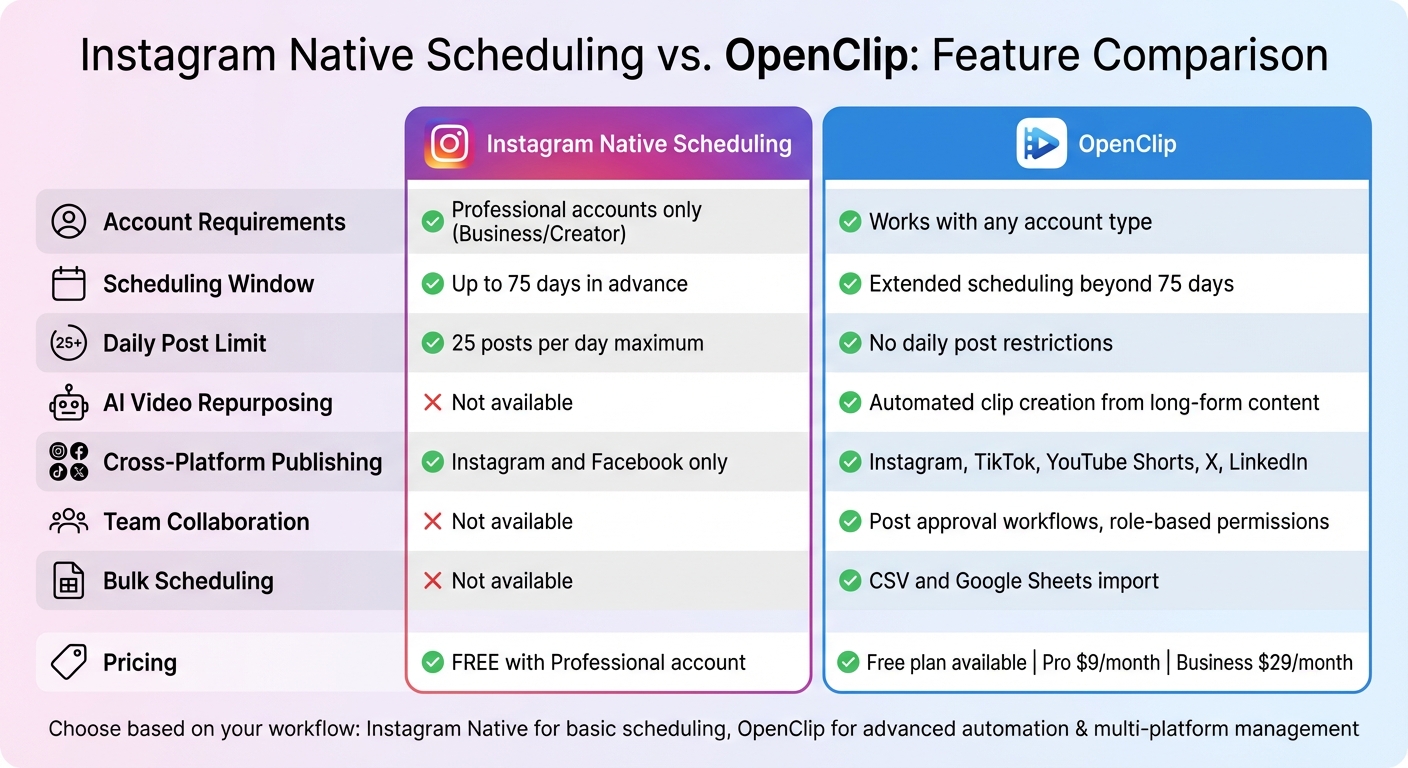
Instagram Native Scheduling vs OpenClip Features Comparison
Instagram’s built-in scheduling tool is a basic option for posting but comes with significant limitations. First, it’s only available to Professional accounts - meaning Business or Creator profiles - so Personal accounts are out of luck. On top of that, it doesn’t allow scheduling posts with product tags, collaborative posts, or sponsored content.
On the other hand, OpenClip takes scheduling to the next level by automating the entire content creation process. You can upload long-form videos, and OpenClip’s AI identifies the most engaging parts, reformats them into the 9:16 aspect ratio, and schedules them across Instagram, TikTok, and YouTube Shorts - all at once. Unlike Instagram’s native tool, OpenClip also supports scheduling beyond Meta’s platforms, making it perfect for multi-platform campaigns. This is especially helpful for teams managing collaborative projects.
Another area where Instagram’s native tool falls short is collaboration. It doesn’t offer features like approval workflows or role-based permissions. OpenClip, however, includes these tools in its Business plan, which costs $29/month. This plan also provides team invites, unlimited brand profiles, and 360 minutes of processing time each month.
Feature Comparison Table
Feature Instagram Native Scheduling OpenClip Account Requirements Professional accounts only Works with any account type Scheduling Window Up to 75 days in advance Extended scheduling beyond 75 days Daily Post Limit 25 posts per day No daily post restrictions AI Video Repurposing Not available Automated clip creation from long-form content Cross-Platform Publishing Instagram and Facebook only Instagram, TikTok, YouTube Shorts, X, LinkedIn Team Collaboration Not available Post approval workflows, role-based permissions Bulk Scheduling Not available CSV and Google Sheets import Pricing Free with Professional account Free plan available; Pro at $9/month, Business at $29/monthIf you’re only posting occasionally and already have a Professional account, Instagram’s native scheduler might do the trick. But for those managing multiple platforms, repurposing content, or working with a team, OpenClip’s advanced automation and collaboration tools make it a more powerful choice. Ultimately, your decision should align with your workflow and goals for maximizing engagement across platforms.
Tips for Getting More Engagement on Scheduled Reels
Creating Content in Batches and Hooking Viewers Early
The first few seconds of your Reel are everything. In fact, those initial 3 seconds determine whether someone keeps watching or scrolls away. Reels that are under 90 seconds tend to perform better, so use bold text, quick cuts, or surprising visuals to grab attention immediately. Since 69% of videos are watched on mute, adding on-screen text is a must - not just for accessibility, but also to keep viewers engaged.
Batching your content can save you from the stress of daily filming. By producing 3–4 Reels in one session, you’ll have a steady stream of posts ready to go without the risk of burnout. Take a page from Katie Steckly, founder of Creatorly Media, who managed to film an entire month’s worth of Reels in a single day. She grouped similar shots and scripted each one, making the process efficient and manageable.
Once you've nailed the content, it’s time to expand its reach with smart hashtag strategies.
Using Hashtags and Instagram Stories
Hashtags are more about quality than quantity. Stick to 3–5 hashtags that are highly relevant to your content, as this helps Instagram categorize your Reel effectively. Instead of using broad tags like #Reels, focus on niche-specific ones that resonate with your target audience. Carly Lynn from Instagram emphasizes:
"The quality of your hashtags matters much more than the quantity"
Blend industry-specific terms with niche community hashtags to connect with different segments of your audience.
Don’t stop there - pair your Reels with Instagram Stories to boost engagement. Share behind-the-scenes clips or use “New Reel” stickers to direct attention to your latest post. Features like polls, questions, or countdown stickers can encourage followers to click through. Adding location tags can also help you reach local audiences more effectively.
With your hashtags and Stories working in tandem, the next step is to track how your Reels are performing.
Monitoring Performance Metrics
To refine your strategy, keep a close eye on key performance metrics. During the first 30 minutes to 2 hours after posting, monitor reach, views, impressions, and engagement (likes, comments, shares, and saves). These early numbers can give you valuable insights into how your content is resonating. Pay special attention to watch time and average watch time - if you notice a steep drop-off in the first few seconds, it might be time to experiment with stronger hooks or faster-paced visuals.
Instagram Insights can also reveal when your followers are most active, broken down by hour and day. Forget generic advice about the “best times to post” - your specific audience’s behavior is what truly matters. Christine Colling, Social Media Manager at Later, shared:
"Since introducing Reels to our Instagram channel, we've seen our engagement grow by 280%"
This kind of growth isn’t random. It comes from analyzing what works, testing new ideas, and adjusting your approach based on real data. Keep experimenting with posting times, hooks, and content styles to stay ahead.
Conclusion
Scheduling Instagram Reels is a smart way to stay active in the algorithm while saving time. Posting 3 to 5 Reels per week during high-engagement periods - like 7–9 a.m., 12–1 p.m., and 7–9 p.m. - can help you maintain visibility and streamline your content creation process. This strategy could free up 5 to 10 hours a week for other tasks.
While Instagram’s native scheduling tools are helpful, they come with limitations, such as a 75-day scheduling window and the need to upload Reels one at a time. For those managing content across multiple platforms or repurposing videos, tools like OpenClip offer a more efficient solution. OpenClip not only automates video optimization for platforms like TikTok, Reels, Shorts, X, and LinkedIn but also supports team collaboration - all from a single dashboard.
However, tools are only part of the equation. A strong content strategy is just as important. Consistent posting has been shown to generate 2 to 3 times more engagement than irregular uploads. Timing and quality matter, too: grab attention in the first 3 seconds and aim to keep viewers watching until the end.
Whether you stick with Instagram’s free tools or invest in a platform like OpenClip, success lies in testing and refining. Keep an eye on your metrics, experiment with posting times, and align your content with your audience’s preferences. With the right approach, scheduled Reels can be a powerful driver of growth.
FAQs
What’s the best way to find the right times to post Instagram Reels for my audience?
To figure out the best times to post your Instagram Reels, start by diving into Instagram Insights. You can access this by going to Profile > Insights > Your Audience. From there, check out the “Most Active Times” chart, which shows when your followers are usually online. This is a great starting point for timing your posts.
If your audience spans multiple time zones, adjust your schedule to cater to key regions. For example, if you have a global following, you might need to post at times that align with peak activity in different areas.
Another approach is to experiment with posting at 3–4 different time slots over a two-week period. Pay close attention to engagement metrics like likes, comments, and shares during this trial. This will help you identify the times that consistently generate the most interaction.
Once you've nailed down your ideal posting windows, consider using scheduling tools like OpenClip. These tools allow you to automate your posts, making it easier to stay consistent without extra hassle. Don’t forget to revisit and tweak your schedule monthly to keep up with shifts in audience behavior or new trends on the platform.
What are the advantages of using OpenClip to schedule Instagram Reels?
Using OpenClip makes creating and scheduling Instagram Reels a breeze, saving you both time and effort. Its AI-powered tools handle tasks like transcribing videos, identifying speakers, and breaking down long-form content into multiple, ready-to-post Reels. This means you can skip the hassle of manual editing while ensuring your videos are perfectly tailored for social media.
OpenClip also lets you schedule your Reels to go live during peak engagement times - think midday or weekday evenings - so you can reach a larger audience without constantly watching the clock. By planning and batching your content ahead of time, you can dodge the stress of last-minute posting, keep your feed consistent, and stay in sync with Instagram’s preference for regular, timely updates.
The payoff? More time to refine your creative ideas, better visibility for your content, and steady growth - not just on Instagram, but on other platforms supported by OpenClip as well.
How can scheduling Instagram Reels in advance help improve engagement and save time?
Scheduling Instagram Reels ahead of time can significantly boost engagement by ensuring your posts go live when your audience is most active. This timing increases the likelihood of your Reels getting more views, likes, and shares - key factors that help the algorithm push your content to more people. Plus, posting consistently and at the right times shows Instagram that you're an active creator, which can further expand your reach.
Another major perk? It saves you time. By batch-creating content and scheduling it all at once, you eliminate the hassle of daily uploads. Tools like OpenClip make this even easier by letting you turn long-form videos into short clips and schedule them for optimal posting times. This not only simplifies your workflow but also frees you up to focus on producing high-quality content.
Turn one video into a week of content.
Try OpenClip free